Friday, January 28, 2011

The Thundersnow

I had the fun experience of feeling like "Little House on the Prairie" when we lost power for about 18 hours this week. Thus no blogging for a few days :(

Even though its still snowing, I'm back to the blog because we have power... it is seems like today we are only getting a light "dusting" anyhow.

So for those of you not familiar with a "Thundersnow"... I think the word was coined especially for this storm that hit right in time for rush hour traffic (I live in DC suburbs). It was "pouring snow," traffic lights were out, and it was gridlock. Thank you thundersnow for that brilliant timing.

I personally have a love-hate relationship with snowstorms and blizzards. I don't live someplace where you expect blizzard conditions all winter... this is the DC area, it's supposed to be occasional... and for the most part it is. But all the occasions seem to coincide with my major life events. I will rank this thundersnow amid all the other blizzards and snow snowstorms and how they interfered with my life:

10. When it snowed for my Bachelorette party '09 (ok but a little hazardous)

9. Birthday Snow Day '10 (loved it, got to sleep in)

8. The time in elementary school where everyone got snowed in at my birthday party (loved it)

7. Blizzard of '96 where 1 week of school was canceled (amazing, built lots of snow forts)

6. *Thundersnow* '11 (not so amazing)

5. The ice storm in middle school where school was canceled forever (totally awesome, but not fun to play in)

4. My friends organized a "second reception" for the twenty-somethings who missed my wedding due to the blizzard... and it was snowed out (mostly ironic)

3. When I was committee chair for graduation last February, it was snowed out twice (not so fun rescheduling over and over)

2. My nephew was born in the Feb. '10 Blizzard (my brother and his wife had to stay at a hotel next door to the hospital "just in case" and sure enough she went into labor during the blizzard)

1. My wedding day was the "Blizzard of '09" December 19... I stayed calm despite the 2 feet of snow and everything actually turned out beautifully... lots of changes to our plans... a few stuck cars... less guests... but the pictures were amazing and it was unforgettable!

So back to the thundersnow this week. DH left work at 4:00PM and didn't make it home until 10:30PM. And it turns out that that was the norm for rush hour on Wednesday.

We had lost power long before he came home and thankfully my FIL had stayed home and made dinner (yay!) and suggested we watch a movie while waiting (which lasted until the power went out). He also started a fire. I think I would have been holding my baby rocking back and forth in the corner, freezing and starving if I had been by myself (well maybe not, but I definitely would have been more nervous)... instead I was 3/4 distracted and 1/4 having that terrible feeling in the pit of my stomach hoping DH would get home asap safely. And all of my friends and family would be safe.

We decided it was best to sleep in the room with the fire considering the house is big and the baby needs to stay warm. "DIY Heat" aka fire :-)

We used all these blankets to create a bed on the floor:


Like camping.


It seemed exciting at first, but with the baby being right next to me, he wanted to eat all night, and my neck is still killing me today from sleeping on hardwood floors.


The fire was crucial, no amount of blankets would have brought us so much heat... and reassurance to me that our baby would not freeze.

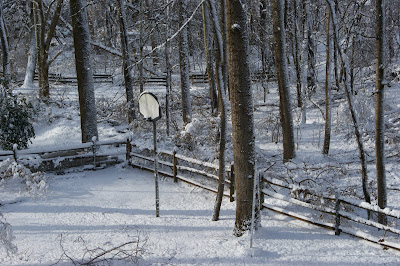
A few pics of the snow:


Tuesday, January 25, 2011

Chicken Noodle Soup

This cold weather has me chilled to the bone and I decided it was time to try my hand at chicken noodle soup from scratch.

Last week I bought a whole chicken for the first time at Trader Joes. After checking out several different ways of making the soup (including stock from scratch), I settled on a recipe from Food Network.

It was pretty easy, but there was a lot to do. I started making the stock around lunch and the soup was done at 4:30.

I thought making stock would be complicated... but its not. Just put the chicken and veggies in a pot, boil, and simmer.


I let the flavors mingle for about two hours. The kitchen smelled so good!


Once the stock is done, then you pull apart the chicken with your hands!! Reminds me of a dissection but less gross :-)


I tossed the rest of the stock ingredients down the disposal (makes me want to start composting) and chopped up fresh veggies for the soup. Chopping these veggies was the most time consuming part of the whole deal. I never liked chopping veggies... I also cut my finger mincing garlic :/ (I couldn't find our garlic press so I had to do it by hand)


Cooked veggies, added back stock and simmered...


The last step was adding the noodles and the shredded chicken:


I followed the recipe closely except for these things: I used dried thyme instead of fresh*, added cayenne pepper for a kick, and had a 4 1/2 lb. chicken, so I made 3 quarts of stock instead of 2.

I can say without a doubt that I prefer this homemade chicken noodle soup to soup I could buy out. It just tasted like real food. And healthy... no preservatives, good veggies, fresh. Yum.

Cost Comparison:

The quality was definitely above canned soup... so there is just no comparison there. The level of soup quality is more like take out, or deli quality.

Chutzpah Deli sells chicken noodle soup with fresh chicken and fresh veggies for $4.50. (And if you live in Northern VA and haven't tried Chutzpah, they have great food!)

Some of my prices are Wegman's and others are Trader Joe's:

TJ Whole Chicken $1.29/lb., totaling $6.02
TJ Carrots $ .89
W Yellow Onions $1.00
TJ Celery $ .90
W Garlic $1.25
W Thyme $4.49/.7 oz. ... ~$.06 **
W Cayenne Pepper $2.99/oz. ... ~$.20 **
Salt < $.01
Pepper < $.01
(the cost of spices are estimates obviously b/c sometimes I don't really measure them)

Cost = ~ $10.33
# Servings was about 10 (the recipe was only for 4 but my chicken was a pound larger and I made 3 quarts of stock so we had more soup)

Cost per serving = ~ $1.03

It's about a quarter of the price, but it does take time. To me, it was totally worth it and it was great to have several meals out of it! Plus waaaaaaay less sodium and zero preservatives... and that lovely sense of accomplishment.

Saturday, January 22, 2011

Cinnamon, Bananas, & Soft Skin

Three quick & easy do-it-yourself ideas:

1) Substitute for Air Freshener

This is s super simple way to have your kitchen/house smelling yummie.


1/8 tsp vanilla extract & 1/4 tsp cinnamon:


Add 1 cup of water and set on the stove to simmer:


Worthwhile? This is a great trick for making it smell like you were just baking, but doesn't truly replace air fresheners because it has to be in the kitchen. I am looking for ways to make all natural air fresheners for other rooms. The cost was ~$0 since I used spices that I already had and the amounts can be varied.

2) Baby Food Bananas

Bananas don't have to be cooked or pureed (though you can puree if you want). Simply cut a small piece of banana:


Mash with a fork and add a little water to thin (I added 2 "forkfuls" of water):


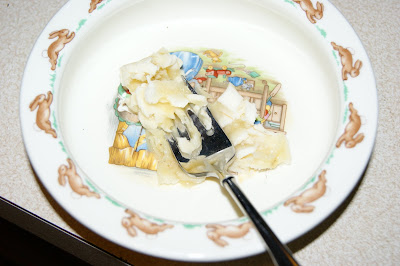
Serve:


Worthwhile? I got my Bananas this week at Trader Joe's for $.19 each. I got about 4 servings out of 1 banana, so each serving was <$.05. It was very little effort and you can freeze them if you want... but I haven't bothered to since I usually keep fresh bananas around.

3) For Baby's Dry Skin: Oatmeal Bath "Sachet"

Now I know you all took an oatmeal bath back when you had the chicken pox but it also helps dry skin. To read about some of the reasons oatmeal is good for skin check out this website. (there's also a recipe for a face mask... I might have to try that out)

When lotion wasn't enough to keep my baby's skin healthy this winter, I stopped using soap and started using oatmeal. This is a trick I learned from my hubby's family. I never would have thought of it myself but it was much easier than grinding up the oatmeal.

What you will need: cheese cloth, oatmeal, rubber band or twist-tie:


Put the oatmeal in cheese cloth:


Use rubber band or tie to make a "Sachet":


Soak in luke-warm bath water.

Other tips - I use the little sachet of oatmeal like I would a washcloth and rub it on the areas where there is a patch of dry skin. I don't use any soap or other products in the bath. And I don't rinse him after, I figure the goodness of the oatmeal can stay on his skin and help it to heal. These days he probably smells like oatmeal and milk, but I really don't care ;)

Worthwhile?
Oatmeal $1.99
Cheese cloth is $4.99
They were both things we already had. A 5 oz. bottle of Aveeno ecxema cream costs between $6 & $8 depending on where you purchase it. Rather than buying that, I am using cheaper lotion in addition to the oatmeal bath and it seems to be helping my little guy's skin to heal. For me it is a worthwhile tip because I didn't want to test out several different products trying to find one that helps. At least I know that oatmeal won't hurt, whereas other products might have irritants.

Thursday, January 20, 2011

Baby's New Cuisine

Baby boy ready for his new food:


I heated it up in an adorably tiny sauce pan with a little water and rice cereal mixed in:


He didn't actually eat much, but he enjoyed playing with the spoon:


Pretending to eat is fun:

Tuesday, January 18, 2011

Making Baby Sweet Potatoes


I want to make all of my baby's food at home for two main reasons, 1) save money 2) more control over what is in his food.

My little man is just shy of six months now so I am trying to stock up my freezer. I know if its not ready to eat, I will end up buying jars from the store and I would rather not.

Today I made baby food sweet potatoes. I went to a moms group last week and we made lots of food together and you can see that here, in my original blog. In addition to getting advice from friends, I used a few on-line resources:

Wholesome baby food is my fav:
http://www.wholesomebabyfood.com/sweetpotatobabyfoodrecipes.htm

This video on You Tube was also helpful.

Step 1: Bake Sweet Potatoes

I washed them


then poked holes with a fork


and washed them a second time


wrapped them in foil


I put them in the preheated oven at 400 degrees and baked them for 40 minutes. I checked on them and they weren't soft enough, so I baked them another 30 minutes (total of 1 hour 10 min), and they were just right.


Step 2: Puree

Scoop out all the "meat" into a food processor


Add a little breast milk, formula, or water until you reach your desired consistency. I just added a little water to thin it out a little since it will be a first food for my little man.


Step 3: Store

First I put them into my containers.


Later when they are solid, I pop them out into baggies (I use old breast milk storage bags because I have so many leftover) to store in 1, 2, 3 or 4 ounce portions. I vary it because I don't know how much he will eat at a time in the coming weeks.


COST PER OUNCE:


I threw away my receipt so I had to measure the weight to make my calculation. I put my chemistry teacher skills to good use:

I used 1 sweet potatoes for my calculation. I measured it's weight to be 0.5 lb.


Next, I measured its volume using water displacement: 8 liquid ounces
(Note - the skins throw off the measurement a teeny bit but nothing significant)


Now I have the weight & the volume in liquid ounces, so I can I can convert the cost to liquid ounces (which is how baby food is measured):

My sweet potatoes cost me $.99/lb.

$.99/lb. * .5 lb. = ~$.5

~$.5 / 8 oz. = ~$.06/oz.

My baby food sweet potatoes cost six cents per ounce!! Whoop whoop :-)

Gerber's Sweet Potatoes are $.53/4oz. or $.13/oz.

>50% savings!

Monday, January 17, 2011

Homemade Cookies Introduction

I have always enjoyed making chocolate chip cookies. It's my go-to. And everyone likes chocolate chip, right? Now that I am a SAHM, I'm exploring other things that I can make myself... both in and out of the kitchen.

So far a few things that I have done recently are organic baby food, homemade tortillas, & homemade biscuits. All very yummy. Some plans for the future include growing an herb garden, making some of my own vinegar based cleaning products, and DIY gift-giving.

I am also working on using things at home in place of buying a product at Target... for example, oatmeal baths for my baby with dry skin.

I love to take pictures, so here is my latest batch of cookies:


I think I could eat the whole batch myself...


OK, I'll tell you my tips.

1/ Use fresh ingredients... they'll be good if you use that flour thats been in the back of the cabinet for 6 months... but they'll be great if you just bought it

2/ Salted butter (unsalted ruins the taste)

3/ Use the Kitchen Aid if you have one (not necessary but easier)

4/ I follow the Tollhouse recipe... except for the timing... if you want them to be soft and delicious on day 2 and day 3, you have to take them out at 8 or 8 1/2 minutes... and its deceptive because they look like they aren't quite done... but just try it, you can let them sit on the pan for a few minutes before transferring them to a cooling rack if that makes you feel better

5/ Put them in ziplock containers before they have completely cooled (crucial for day 2 softness


Worth while to make your own cookies?

I use Wegman's for my cost analysis (because they have prices on-line)

Flour $1.79 / 5 lb. (20 cups)... so $.18 per batch
Sugar $2.69 / 5 lb. (10 cups)... so $.20 per batch
Eggs $1.29 / dozen ... so $.22 per batch
Salt $.69 / 26 oz. ... 6 tsp. = 1 oz. so < $.01 per batch
Brown Sugar $1.59 /32 oz. ... $.30 per batch
Tollhouse Chocolate Chips $2.49
Vanilla Extract $5.99 / 2 oz. ... $.19 per batch
Baking Soda $.79 / lb. ... < $.01 per batch
Butter $2.49 / 1 lb. ... $1.25 per batch

Total Cost to purchase all ingredients = $19.81
(This will only make 1 batch due to the chocolate chips, if I was still teaching chemistry class I would call the chips my limiting reactant)

One batch of cookies = $4.80
(I rounded, only 2 sigfigs, LOL)

Now - what do I compare homemade cookies to?? I mean Chips Ahoy is $2.99 but you can't even compare... Wegman's version of homemade cookies are a whopping $10.99!!! So I think it is pretty safe to say that making them yourself is worth while!!! :) Happy Baking


I didn't know how else to introduce this blog then to give an example of what I do! This is what happens when you are a science teacher turned SAHM.